Teamwork's (Formerly Dolce Software)
MINDBODY Connector for RUN Powered by ADP®
Purchase Guide
A Teamwork representative will meet with you via conference, and walk you through the following steps for purchasing and using the MINDBODY Connector! Please email teamworksupport@spoton.com with a time that works for you. See the note below for multi-unit operators prior to setting your onboard appointment.
Important note for users with Mult-Unit Access: If you have access to multiple locations or business units with the same User Credentials, i.e. if the same username can be used to access multiple accounts, you will need to establish a unique admin login for each business unit. Please see: https://support.dolceclock.com/help/preparing-multi-unit-adp-run-accounts-for-adp-app-marketplace
If you experience technical issues with this step, please email: MINDBODY_Support@adp.com
This step must be complete before setting up the MINDBODY Connector.
Steps to Purchase the MINDBODY Connector on ADP Marketplace
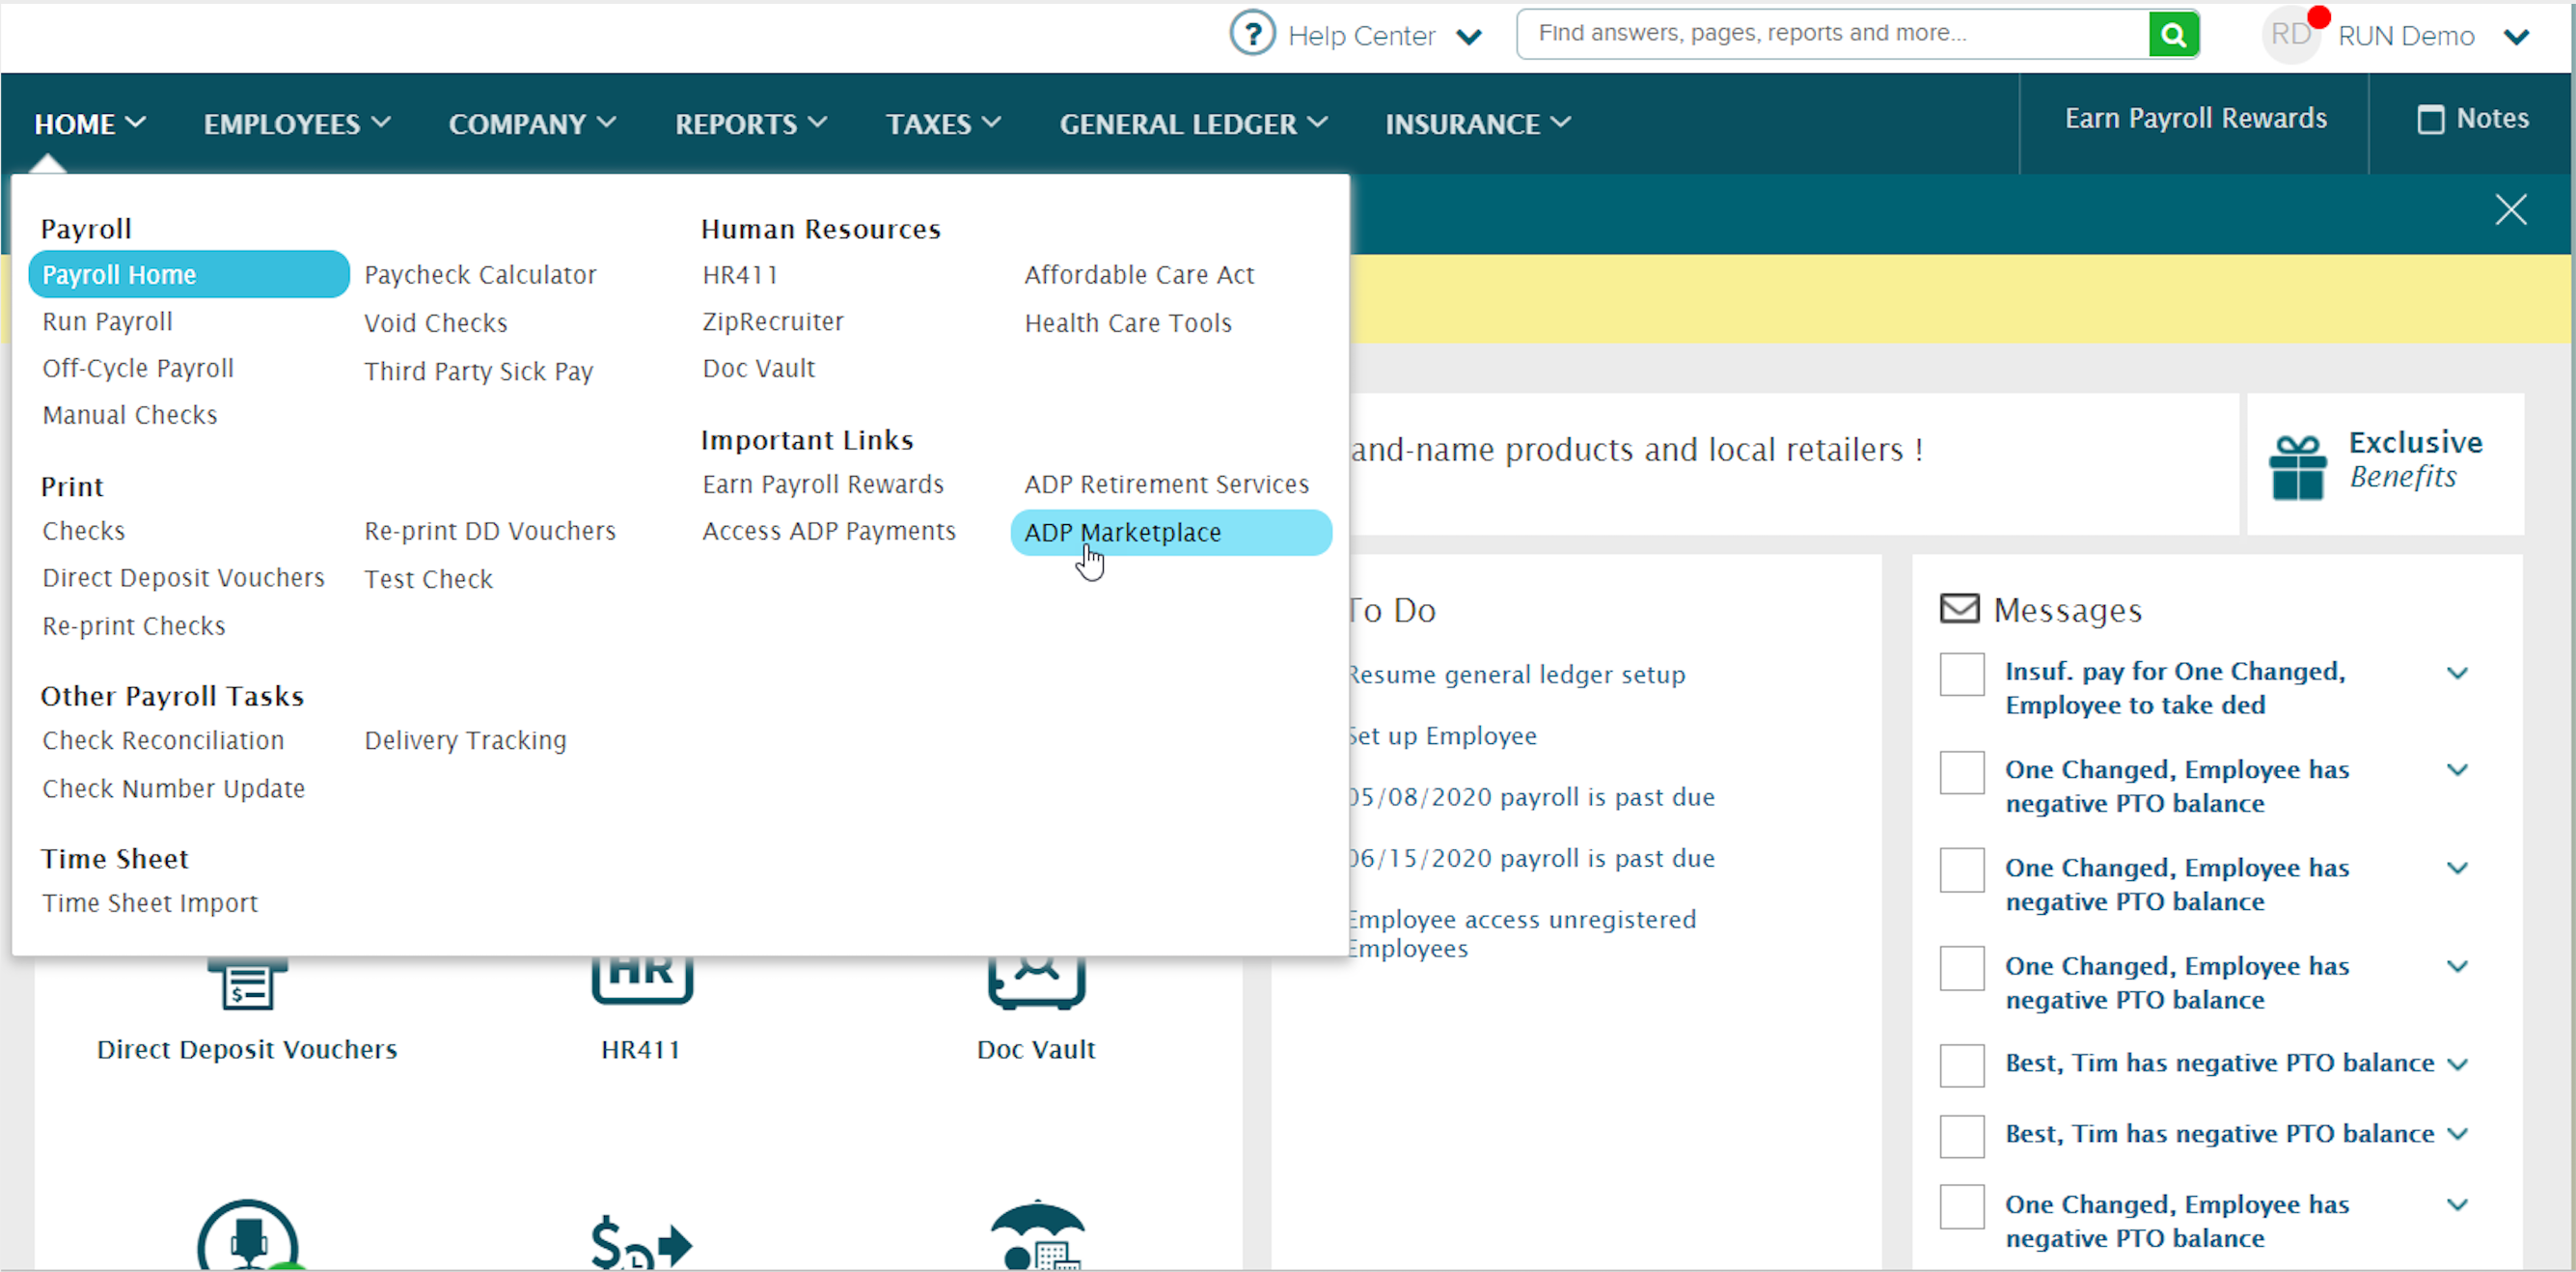
1. Once logged in to RUN, go to the Home tab and click on ADP Marketplace.
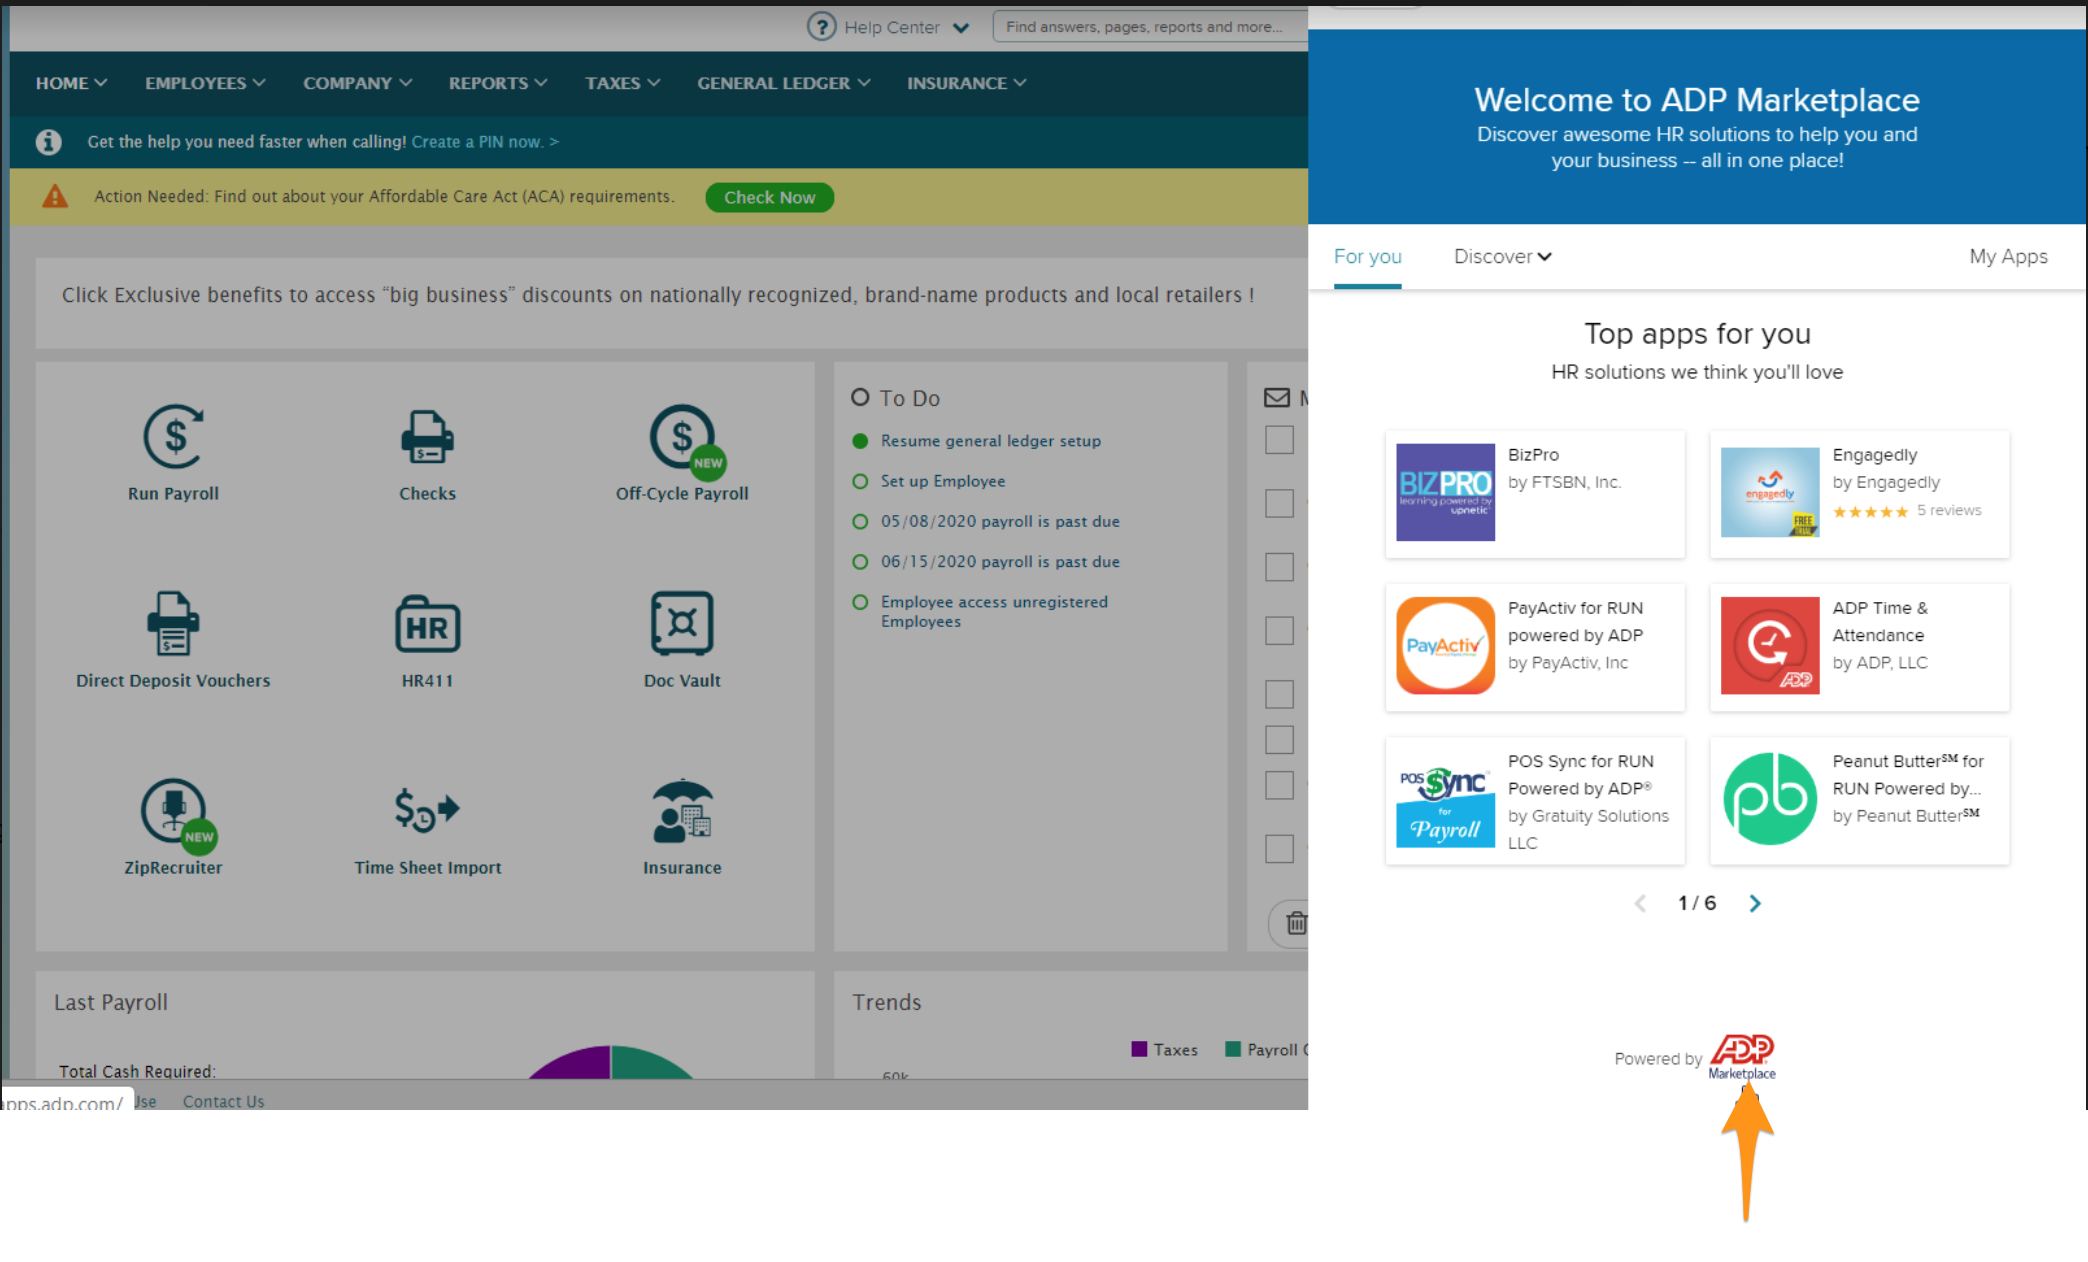
2. This will open ADP Marketplace in RUN. Click on the ADP Marketplace logo at the bottom of the page.
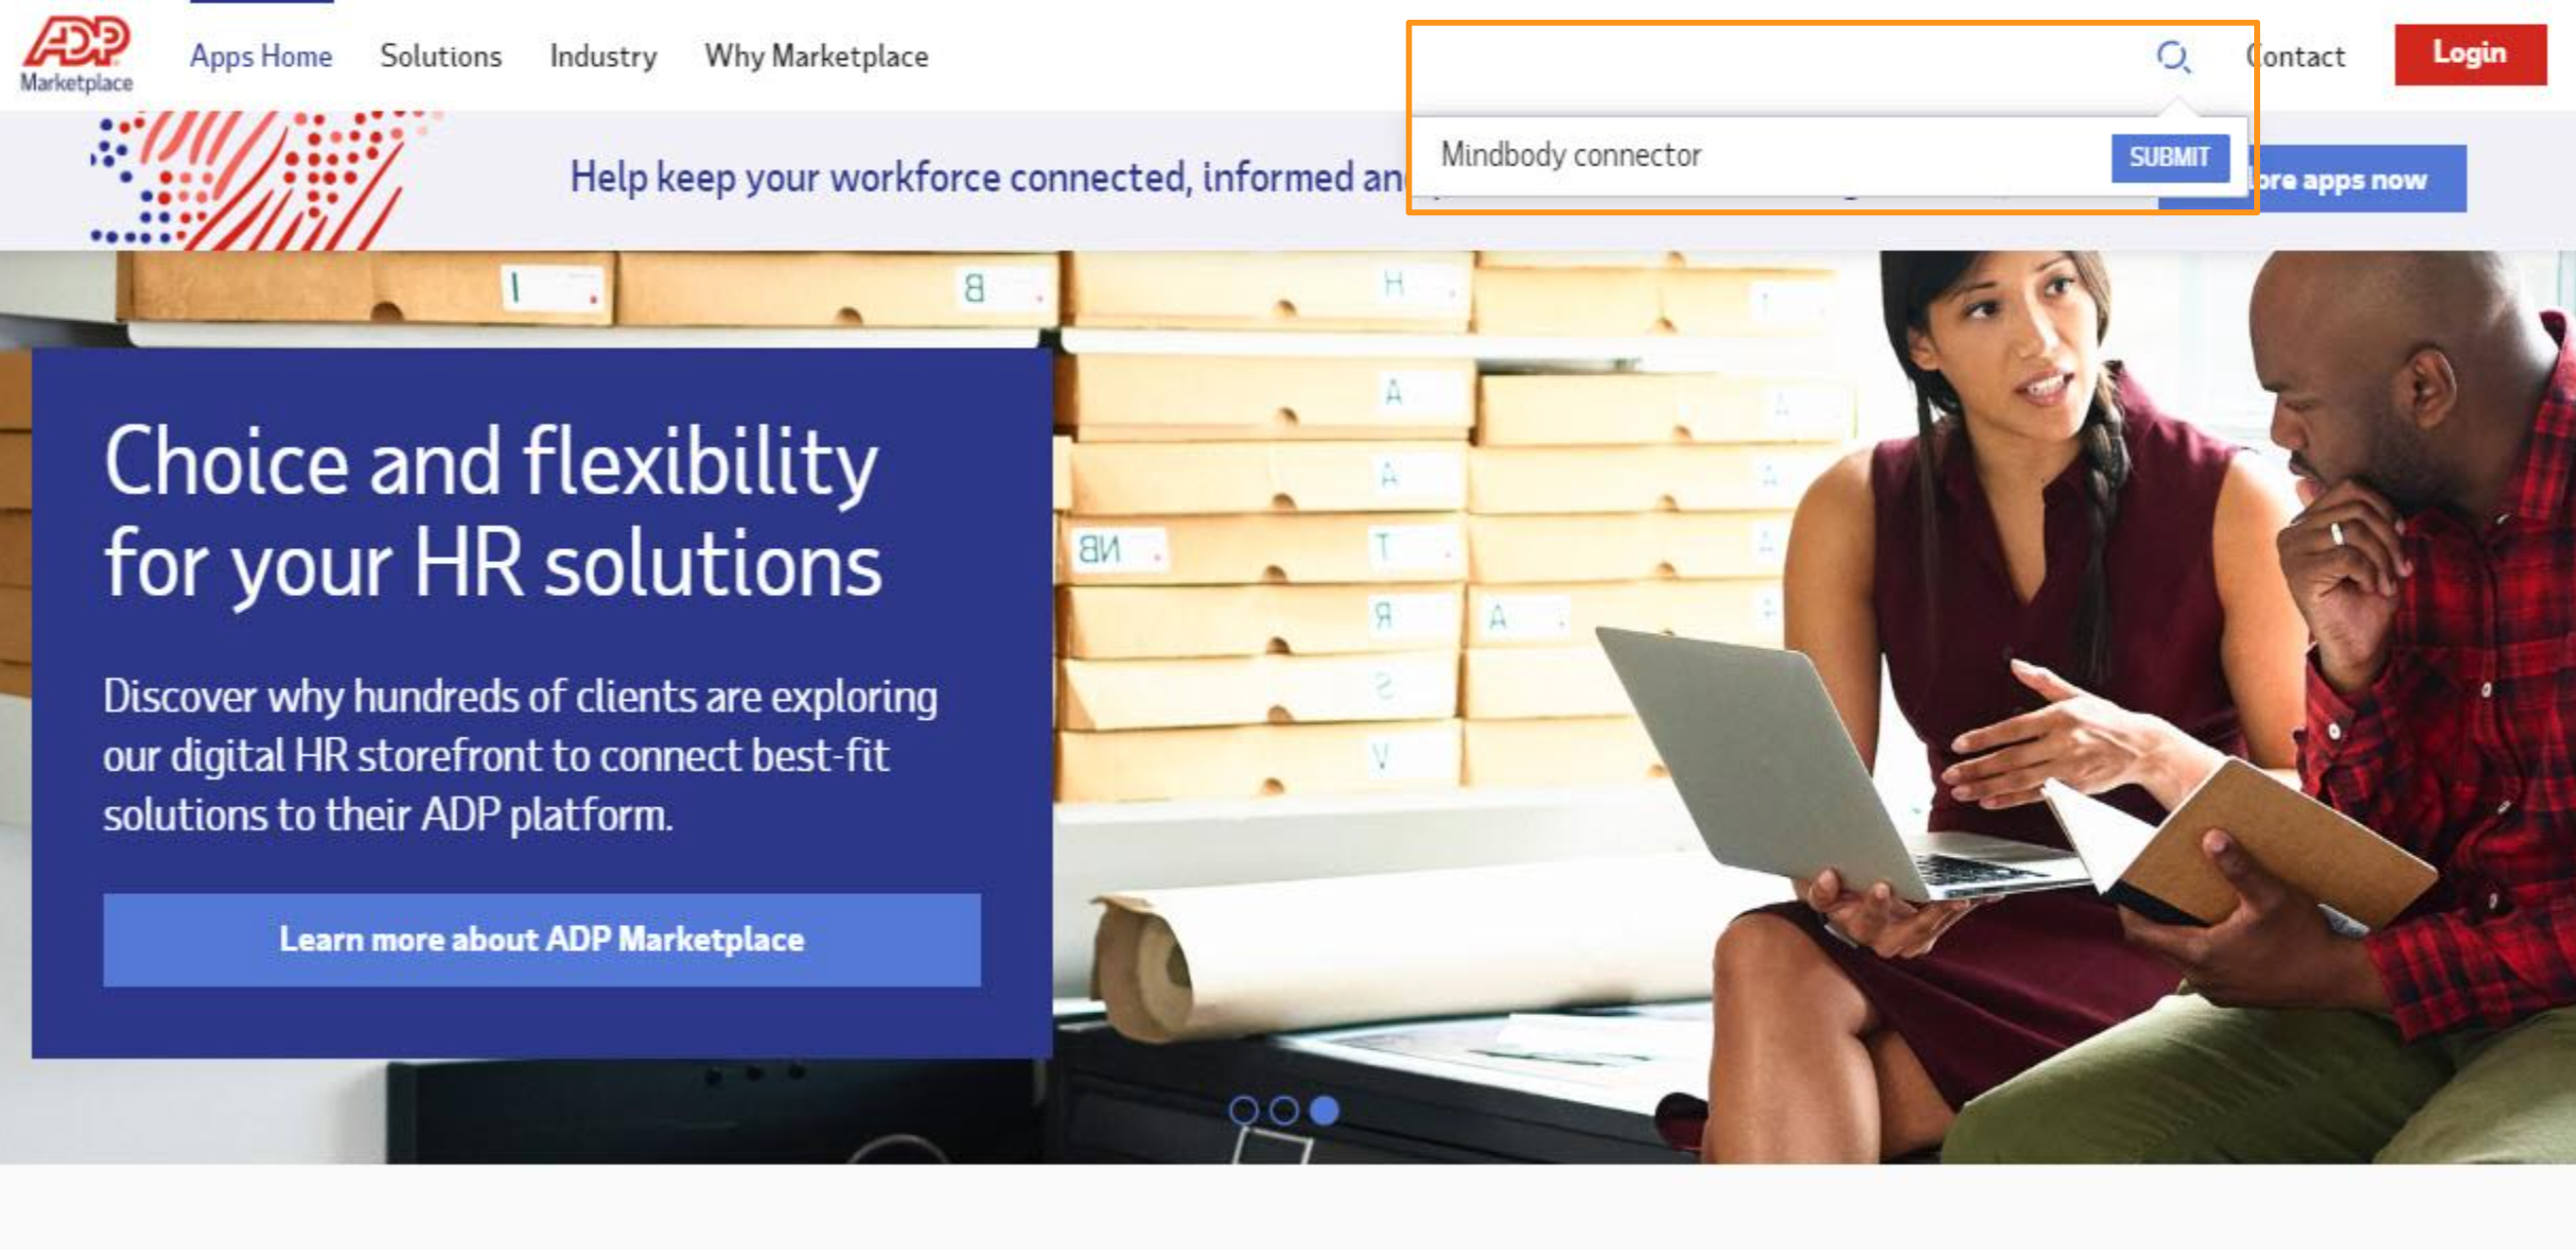
3. Once on the homepage of ADP Marketplace, use the search bar to search the MINDBODY connector
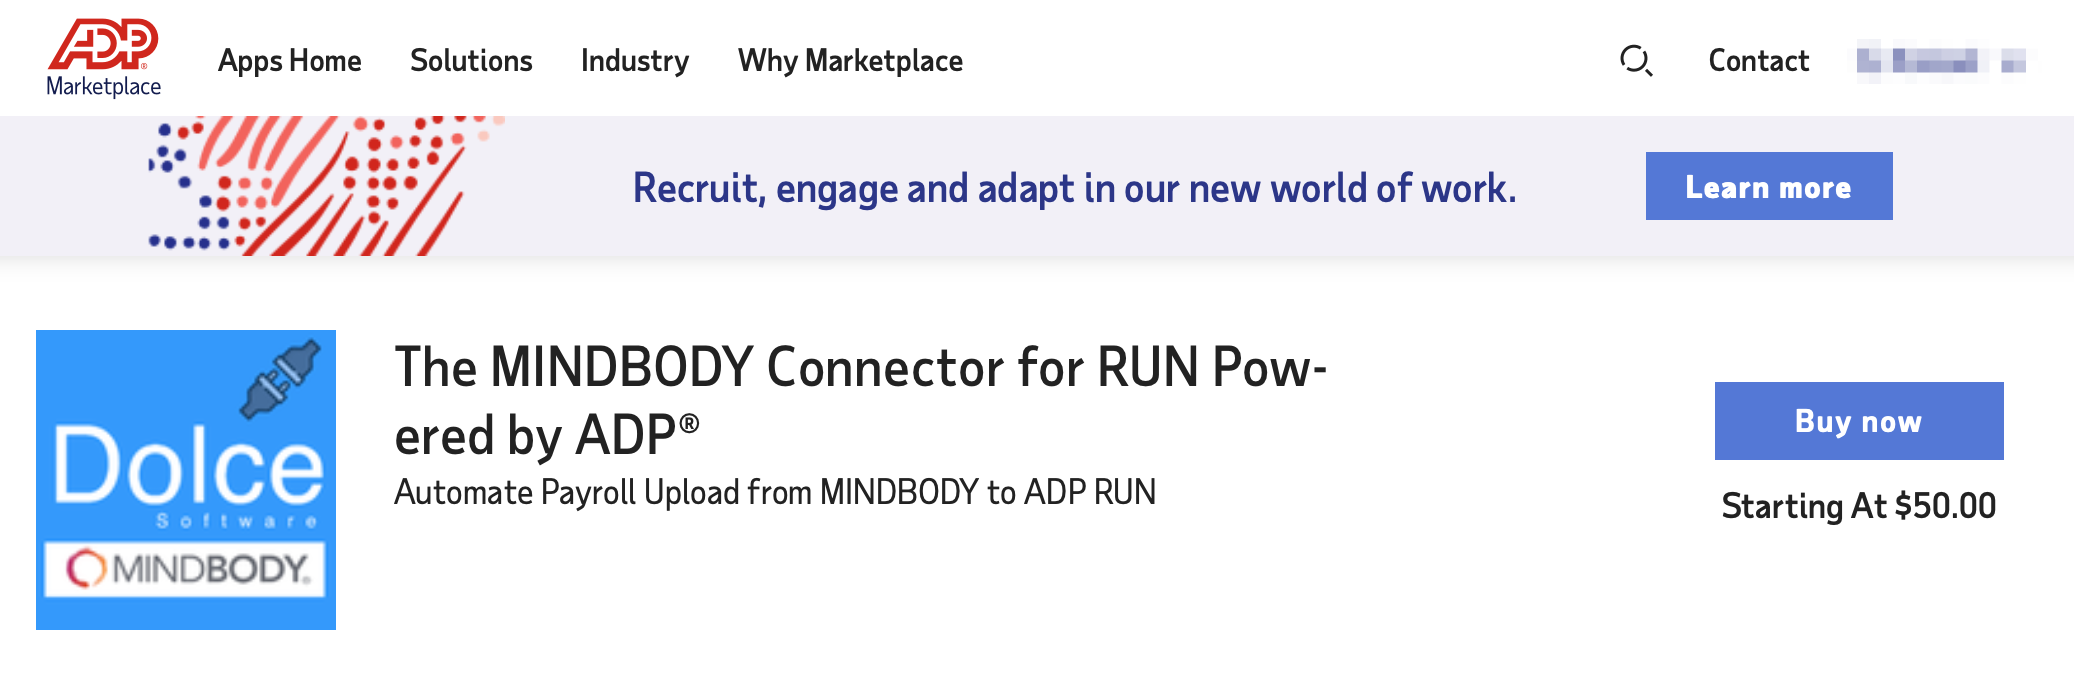
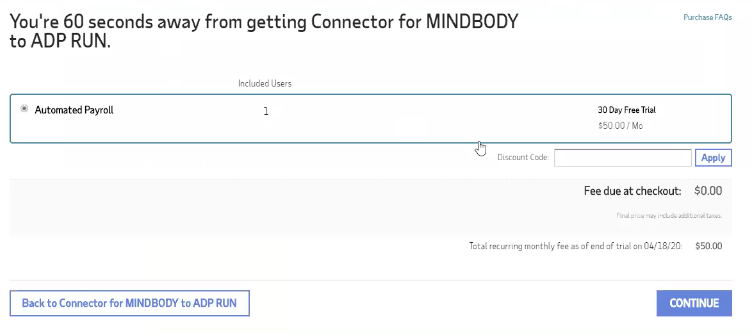
4. Select the MINDBODY Connector for RUN Powered by ADP®. Once on the listing click Buy Now.
5. Select your payment method: ADP Invoice or a credit card. If using a credit card, enter all information requested then, click Continue.
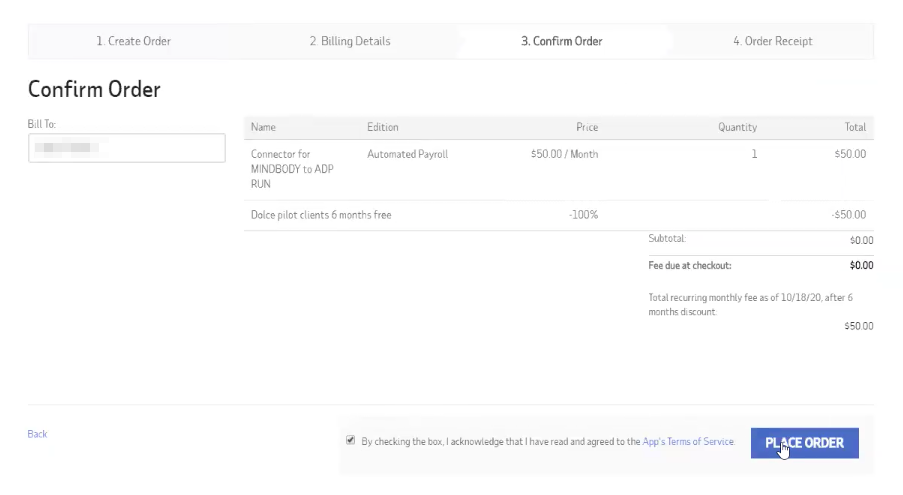
6. On the Confirm Order page, review the order to confirm it is correct. Click the check box to acknowledge and agree to the Terms & Conditions. When you are finished, click Place Order.
7. On the Order Receipt page that opens, click Grant Access.
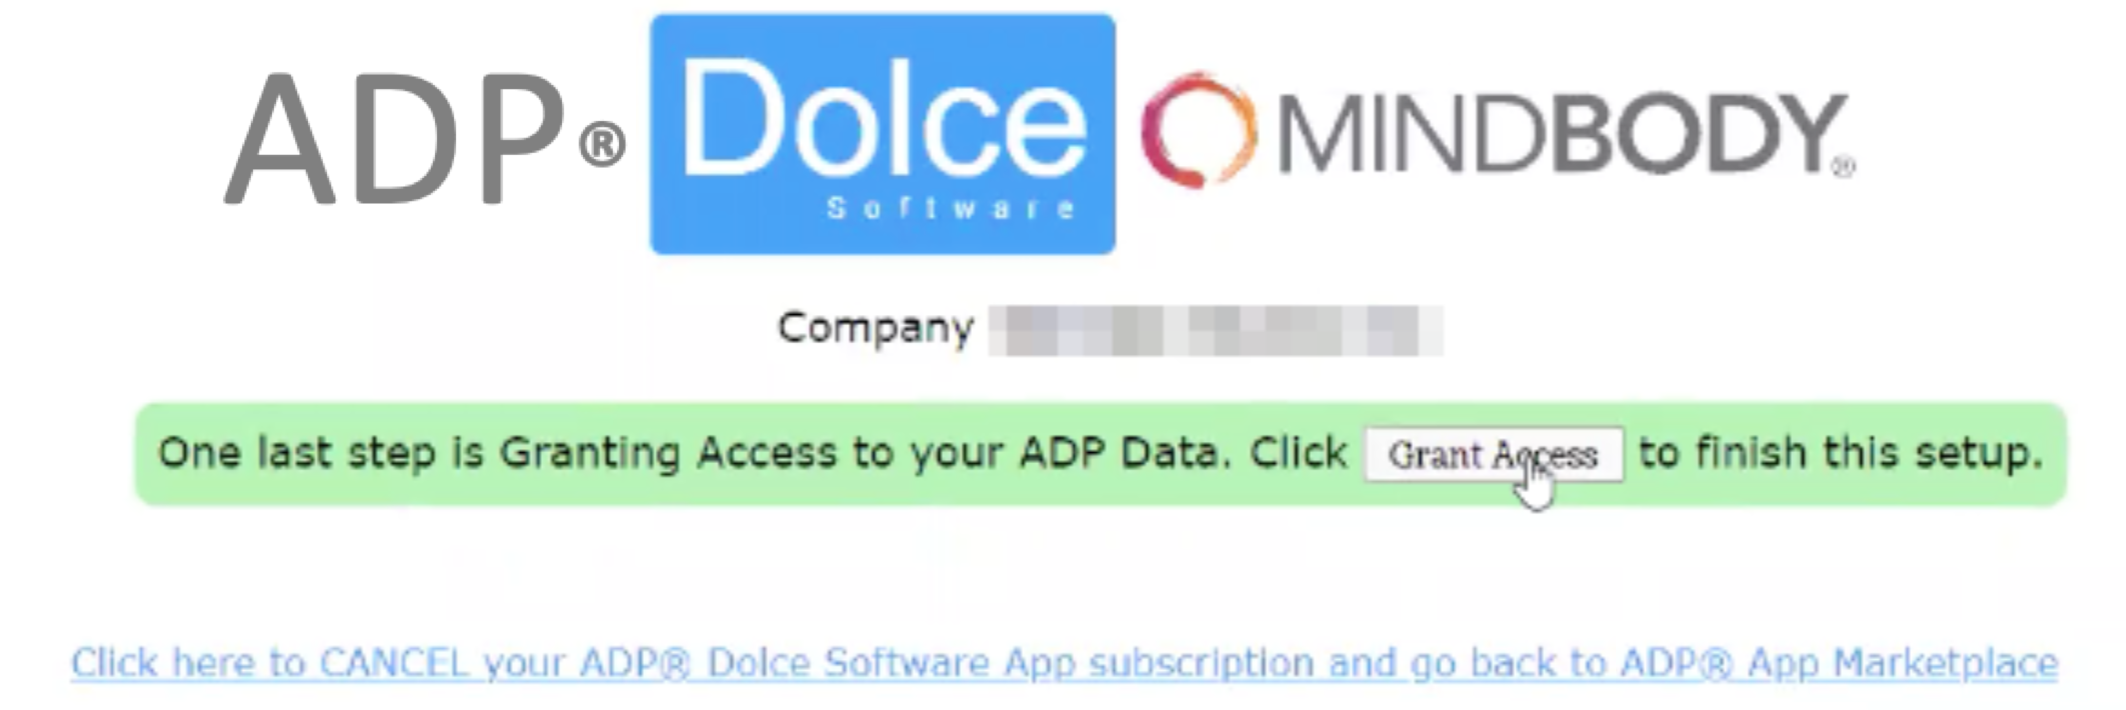
You’ll see confirmation connection and a click through to the next step.
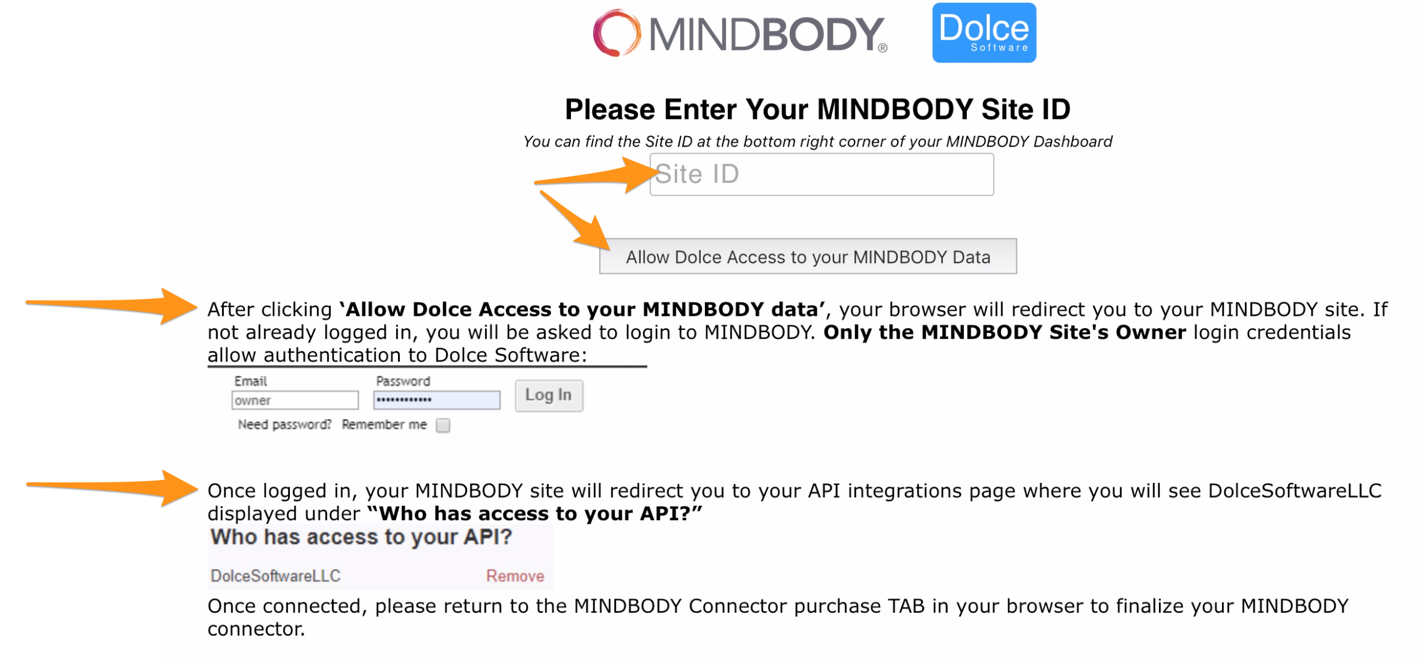
8. Next, enter your MINDBODY Site ID into Teamwork, and click Allow Access to MINDBODY data. Shown below.
NOTE: After clicking the Allow Access button, see the steps shown below the Allow Access button which show the necessary approval step from the MINDBODY site.
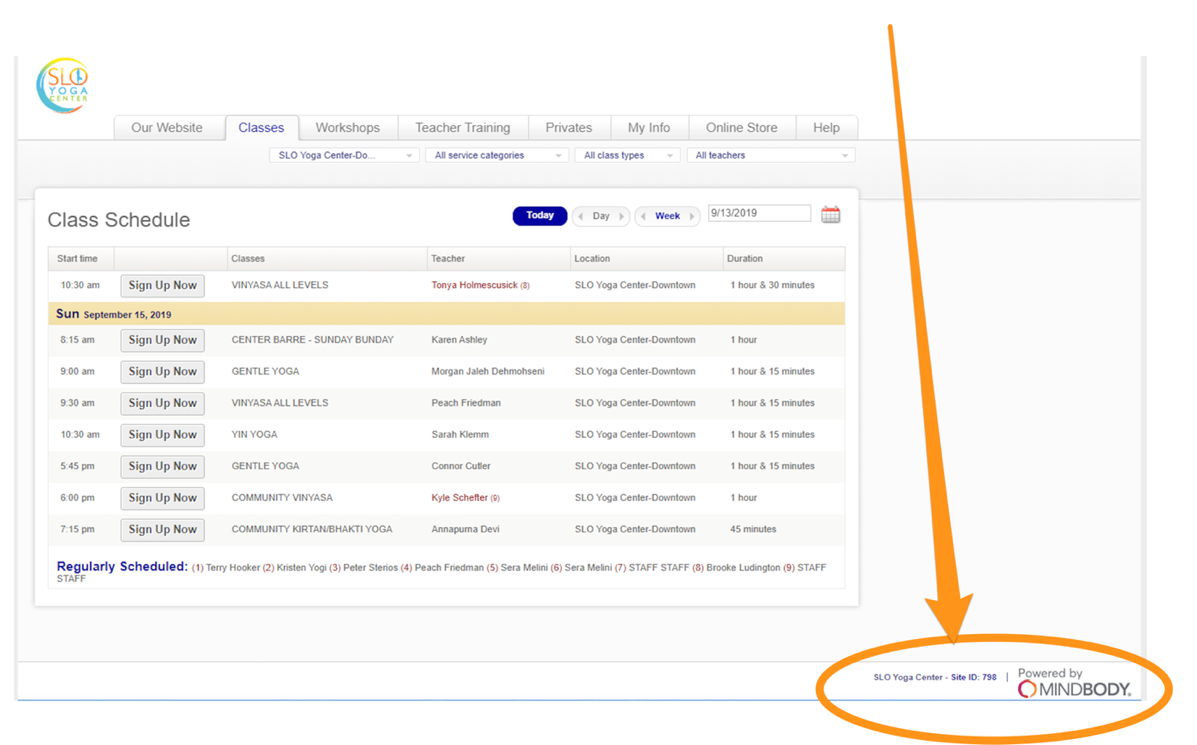
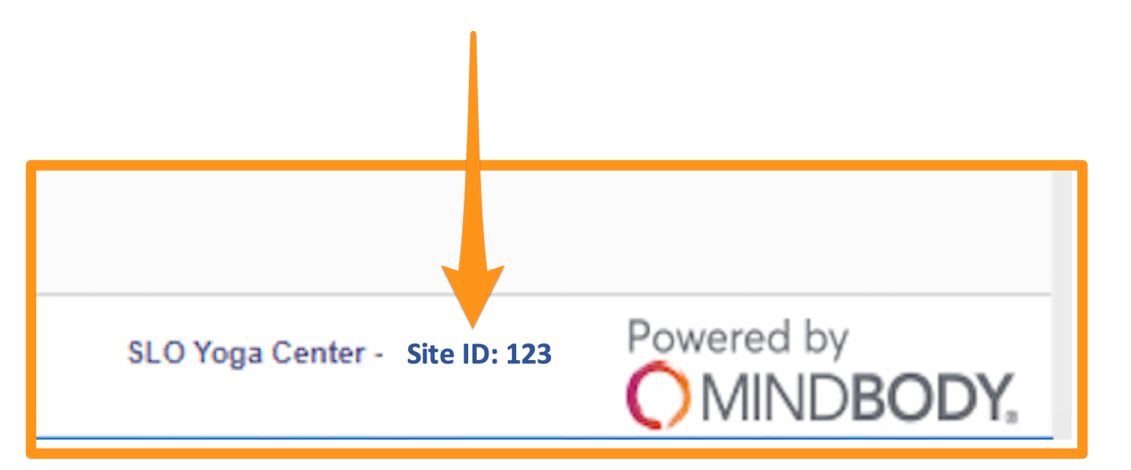
8.aFinding your MINDBODY Site ID
The SiteID is always visible in the bottom right of any screen in the MINDBODY web software.
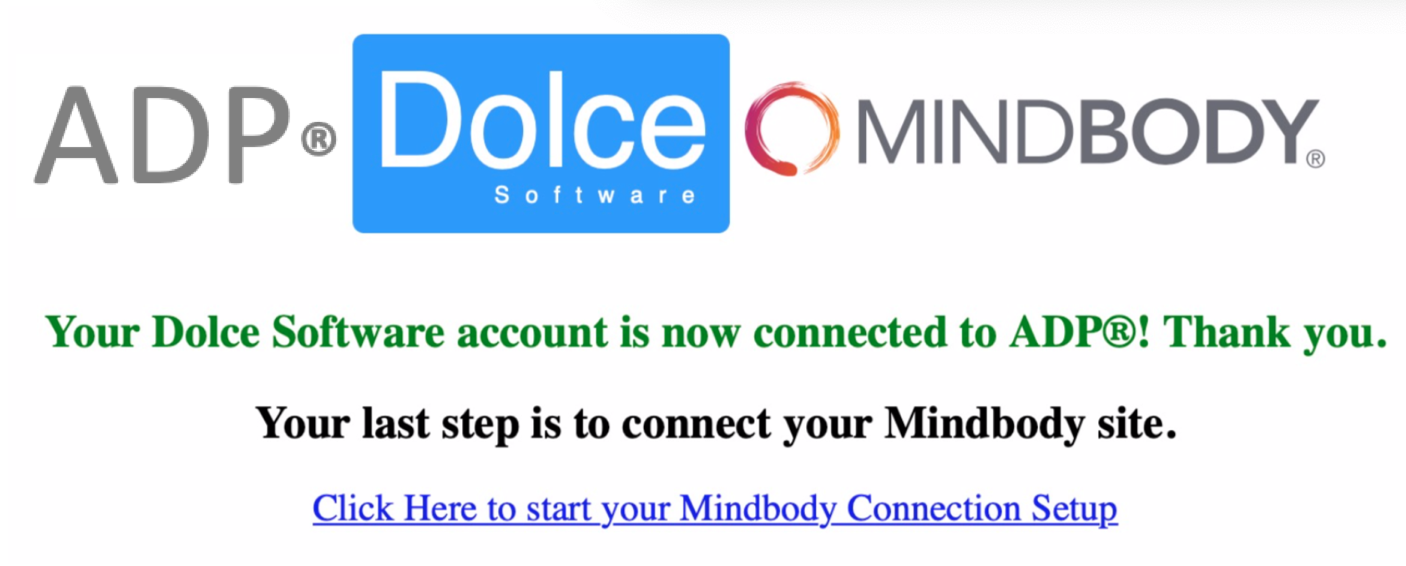
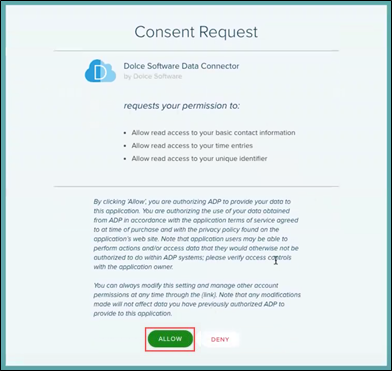
9. A Dolce Consent Request appears. After reading the request, click Allow.
10. A confirmation message appears. Click Continue.

11. You’ll be taken to a MINDBODY / RUN initial configuration screen
Map RUN employees to MINDBODY employees as follows:
- Click Run Payroll from the top toolbar, then click Prep MINDBODY Payroll
- After running Prep MINDBODY payroll go to ADP Mapping Setup from the top toolbar, and click on the ADP account, it will look like a blue rectangle

- Then, verify that the Proposed Name Matches shown below (RUN vs MINDBODY®) are accurate. If any name assumptions are incorrect, press Unmatch
- In the Manual Match Names section shown below, click the RUN name (red column), then click on the corresponding MINDBODY name (pink column)
- Click the yellow Complete Employee Mapping button to complete the name matching confirmation process.
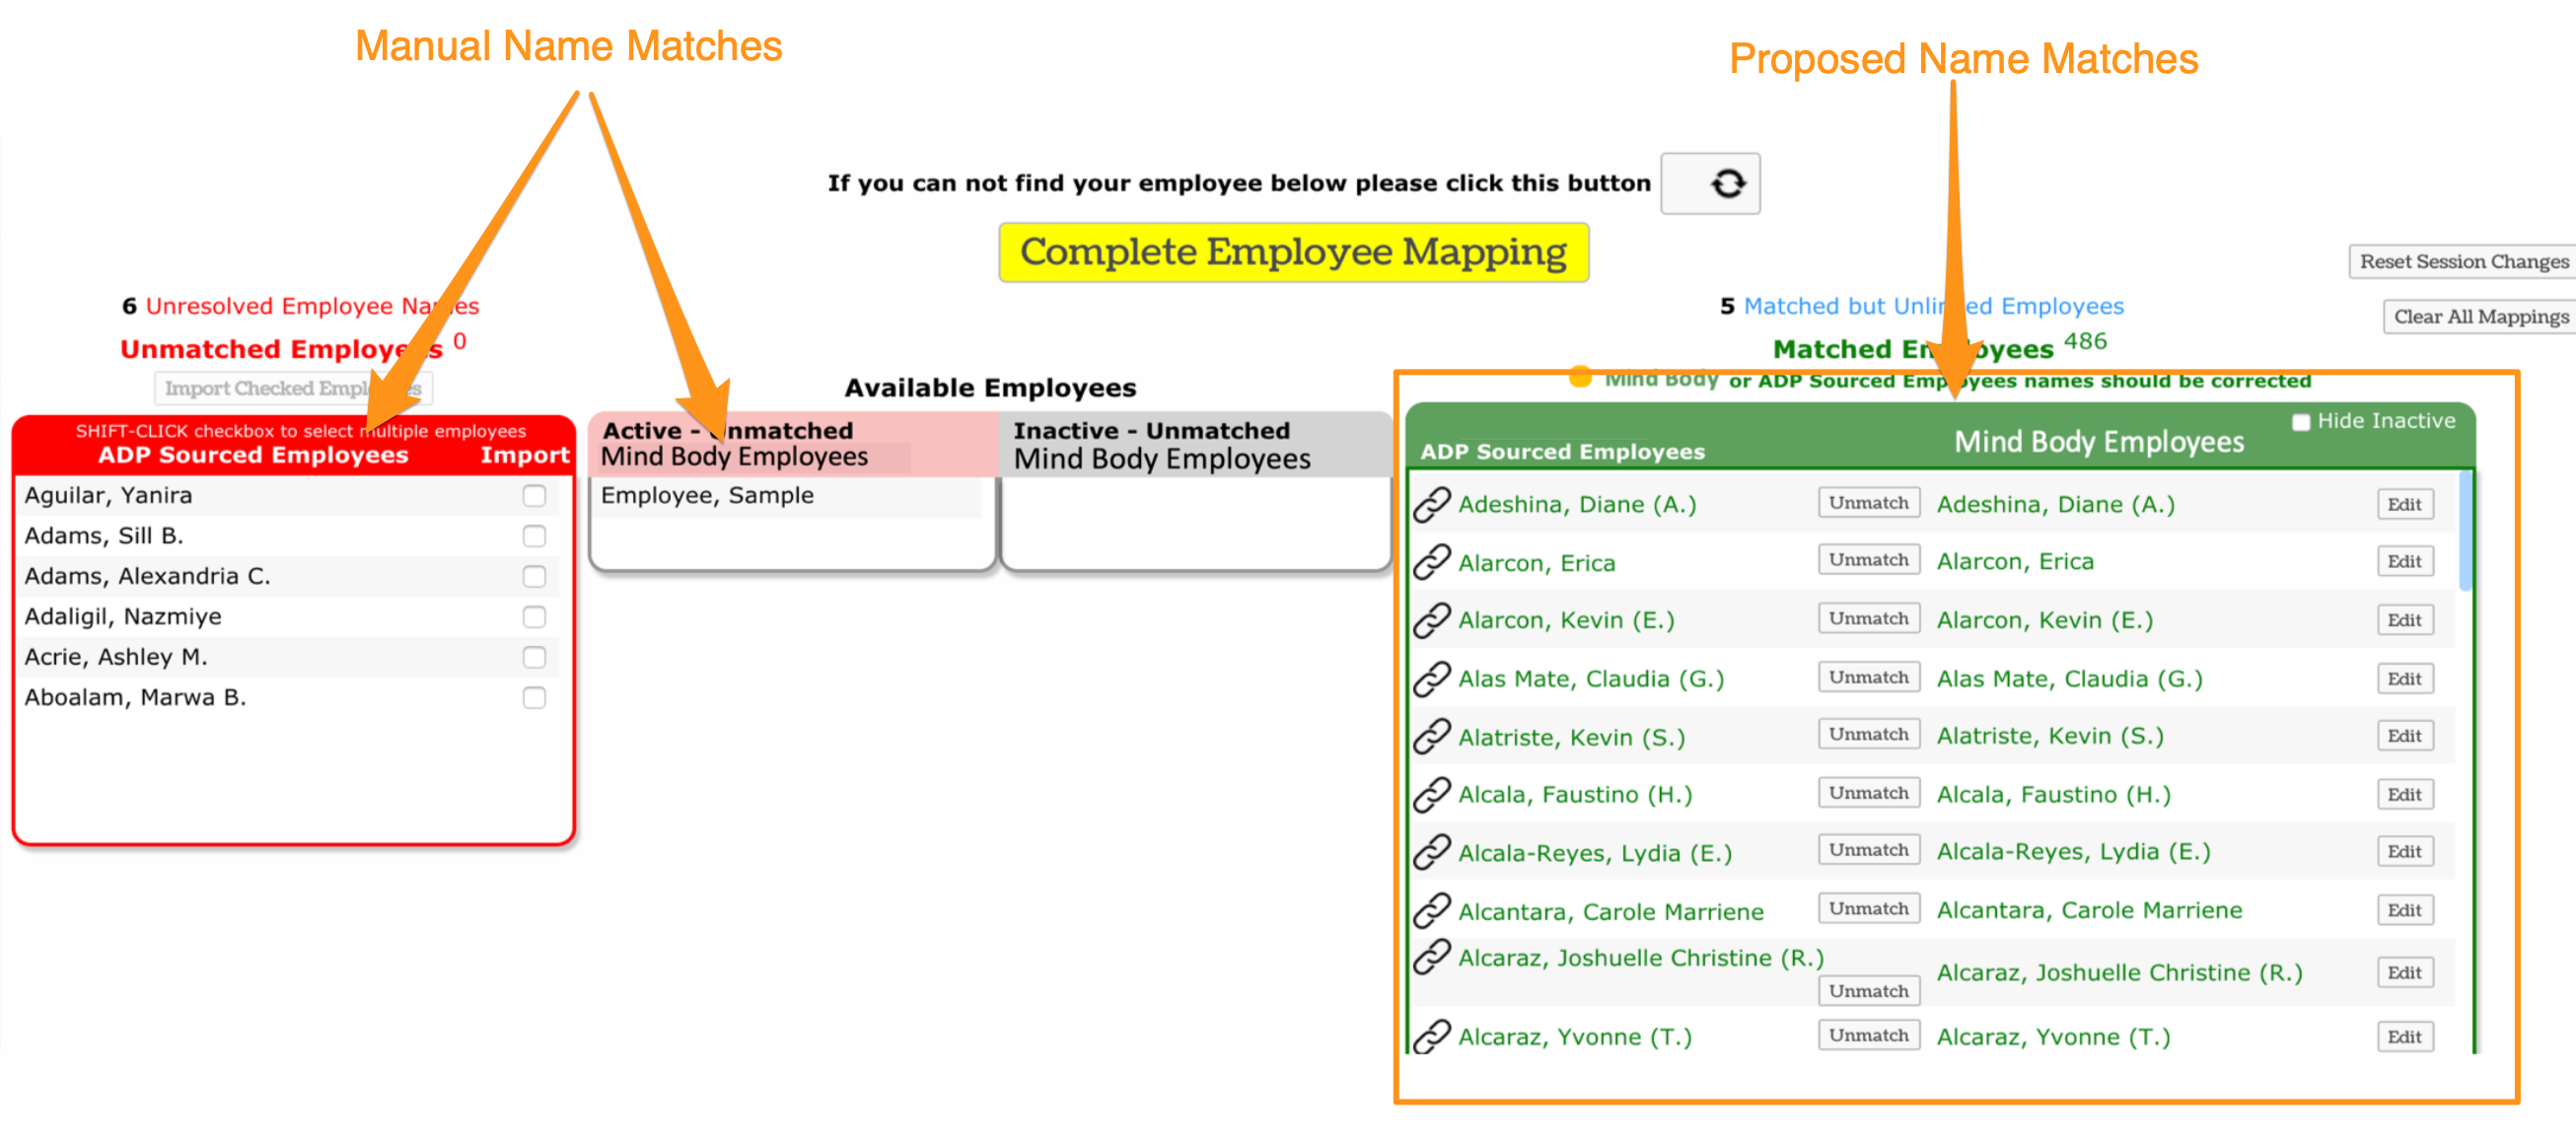
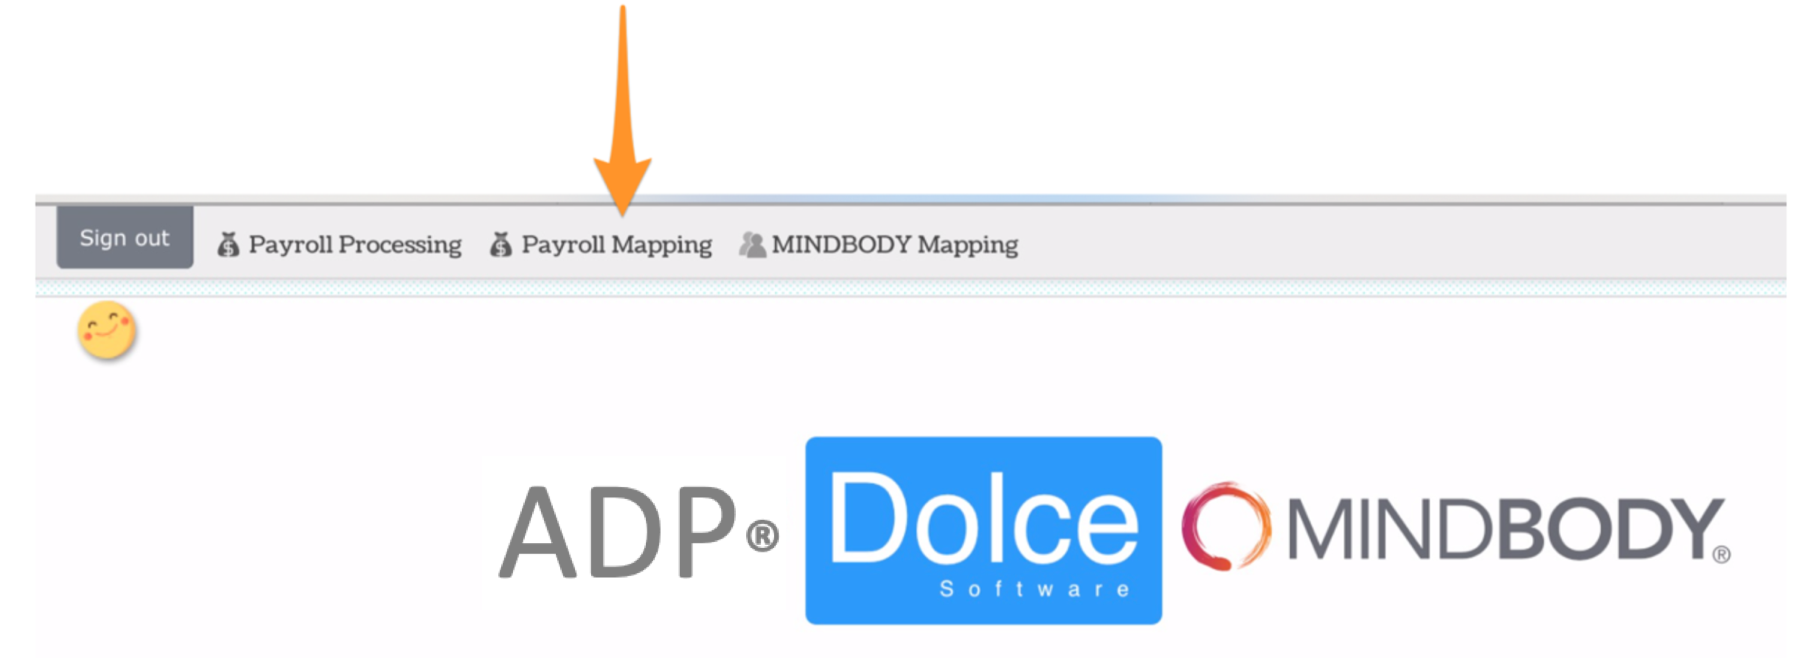
NOTE: You can return to the name matching screen anytime from the Main Toolbar as shown below.

- Mapping Earnings Codes: Scroll down to Role and Earnings Code Mapping, and map Roles and Earnings Codes using dropdown choices.
- If no departments exist in RUN, no mapping selection is necessary.
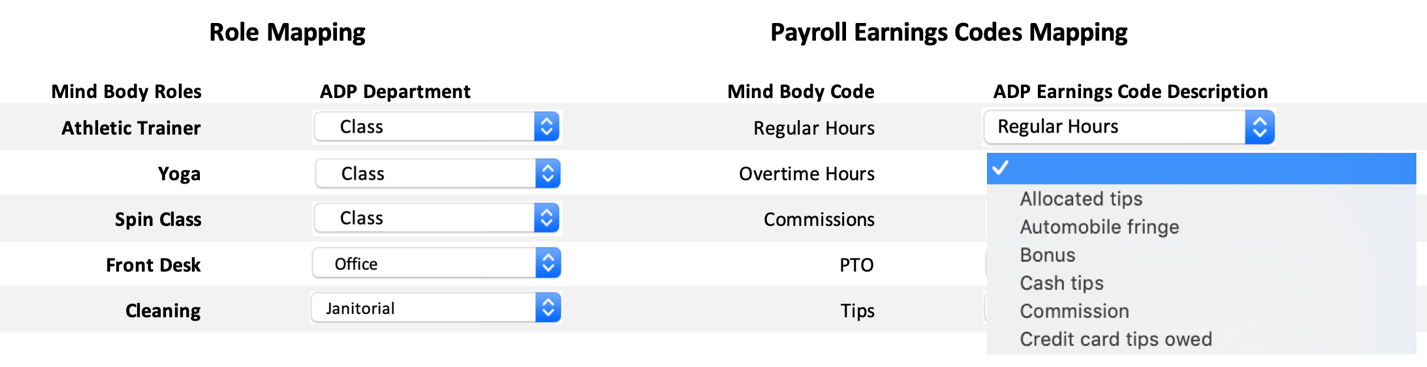
NOTE: You can return to the name matching screen anytime (for instance if you add a new earnings code in the future) from the Main Toolbar as shown below.
Your initial configuration is complete.
Upload Payroll - Click Here
The information in this document was prepared by Dolce Software LLC and Dolce Software LLC is solely responsible for its accuracy and completeness. ADP makes no representation as to the accuracy or completeness of any information contained herein.